

 |
| Linda Kozar striking a crafty pose |
Here's the before picture of my kitchen table. Not bad, right? I bought this hand-crafted table years ago and fell in love with it. But over the years, the tabletop began to feel rough and uneven, staining easily from coffee mugs and spaghetti sauce. My husband and I didn't know that the top was finished with paste wax and just needed another coat from time to time.
So, after a light sanding, my husband painted a coat of Polyurethane on the table top. The result? Not so good. Immediately afterwards, our table would forever be "tacky". I liked to joke with guests about our "tacky" table. But it didn't take long for them to experience it for themselves. Literally, every plate, cup or glass stuck to the table! Let's just say you had to yank hard to clear the table of dishes or even to lift a glass to your mouth. At times it was almost comical. Especially during the Babes With A Beatitude Bible Studies. Every Tuesday, the table would be surrounded by women, trying hard to lift their coffee cups without spilling hot coffee all over the place.
In true Proverbs 31 woman form, I decided to tackle a home project and believe me, I needed a lot of faith to accomplish it! The summer of 2014, I decided enough was enough. A friend had told me about the wonders of Chalk Paint. She'd refinished a bedroom set and was delighted with the results.
Chalk Paint is a wondrous mixture of: One cup latex paint, One-half cup Plaster of Paris, and One-half cup water, that goes on over the surface as is! No need to sand (unless the surface is terribly rough). I should warn you that there is quite a bit of light sanding in store for you however. You will need to sand in between coats. Lightly. Not too bad.
Whaaaat? I almost jumped for joy and decided that's what I needed to do!
So, the day before I planned to begin, I assembled my painting supplies. I like to get that task out of the way so I can get right to the painting in the morning. Makes life easier.
Supplies:
- A tarp or plastic sheet. (Do this project outdoors or in the garage as things get a bit messy).
- Paint tray OR a use a simple plastic vegetable tray you buy some of your veggies in--without air holes at the bottom of course. Lettuce trays work great because the top closes. You can leave your project to take a break and come back to your paint without worry it will dry out. Great way to recycle plastic to good use.
- Paint Brush. An inexpensive medium size brush will do, but you might want to use a few smaller ones to get into tight spots. I had a bunch of old brushes around the house. Maybe you do too.
- Rags. You will need to use a few rags to test dab or clean off excess paint. Old towels work great.
- Sandpaper. Fine sandpaper and/or a sanding block if you have one. Better yet, if you have a rotary sander, use that instead. You'll barely break a sweat!
- Tack Cloth. To clean off the surface. Works great!
- Latex paint. I chose the colors I wanted (which took a lot of time and thought) and bought the more economical half-pints of paint for under $5 bucks a can. You won't need a lot of paint for this project. The water and Plaster of Paris really stretch it. Also, search paint stores for clearance paint. You never know what bargains you'll find.
- Plaster of Paris. Any craft store carries this. I purchased mine at Wal-Mart for under $5. Mine came with four packets to a box and I only used one packet to do the table and chairs. Lots left to do future projects!
- Water. Just plain tap water.
- Latex gloves! Use latex gloves when you paint, ladies. Your hands and manicure, if you have one, will thank you later. Before I started using gloves to paint, I would have to use a Q-tip dipped in nail polish remover to get all the bits of paint out of my cuticles. No more!
 |
| Mix your chalk paint in here and close the top when you take a break from painting. |

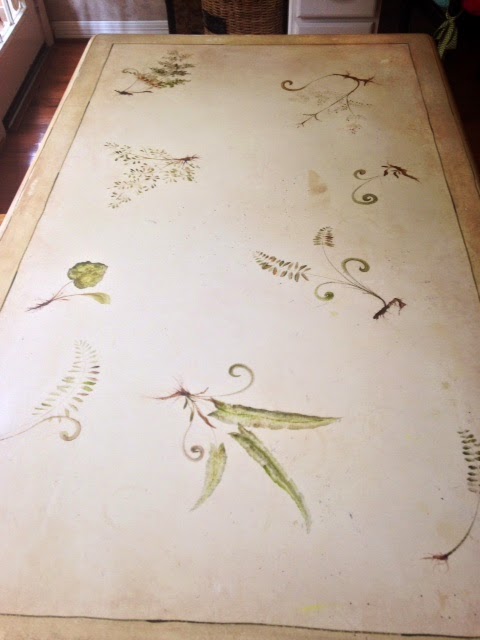
I let that dry, gave it a light sanding as the Plaster of Paris is gritty. I sanded the surface smooth and then applied the second coat, a different color entirely! Valspar's Cottage White. Why? Because I planned to sand it down to reveal little streaks of the green underneath for the rustic charm I was after.

Now for the stencil. I fell in love with a Martha Stewart stencil, but you can use any stencil you fancy OR if you're talented that way, design your own stencil. Ambitious artistes' might want to go ahead and paint whimsical designs directly onto the table. Whatever suits you best.
The colors I used (just tiny bottles of craft latex easy to find at Hobby Lobby), were: FolkArt's Classic Green and Spring green for the leaves and vines, Podge Orange and Napthai Crimson for the flowers.

After the stencils are completely dry, give the surface another sanding. The images should not be crisp. Whaaaat? That's right. You should sand them down and blur them out a bit. But it's all a matter of personal taste. If you want crisp stencils, go for it. I like the vintage sort of look.
The surface of the table should feel smooth to the touch. Caution: use your gloves for this touch test. The oils in your skin will leave behind blotches. Yech!
Use a tack cloth to remove all traces of dust and grit left behind by your hard work.
And now for the wax. I used Trewax paste wax. Definitely use gloves and work in a well-ventilated area. Do not wax in your house or it will create a very toxic atmosphere. The inside of your home will smell like charcoal briquettes! You could experiment with a safer, more natural alternative like beeswax. But I went for the toxic industrial stuff. Alas...
If you have a random orbital sander/buffer, use it! Or maybe your husband waxes his own car and owns an orbital buffer. Use it! Your job will be oh-so-much easier than buffing by hand.
Once the buffing is complete and your table (and perhaps chairs) glow, you're ready to dress your table. I kept my stencils to the four corners of the table with that in mind.


Shop for a table runner, or continue your craftiness and make one. Dress the center with an interesting piece. I found a bowl with a concrete base at Cost Plus for $14.99 and added some items I found on sale at various places. Place mats coordinate with the base color and serve a utilitarian purpose by catching bits of food and splashes. Mine are straw and easy to rinse off.
Voila', your refurbished kitchen table is done. Yes, I was sweaty and tired and inhaled toxic fumes along the way (next time--bees wax for the finish), but my fingernails weren't swathed in paint (thanks to the gloves). AND now my table is smooth, not sticky.
I can't wait for our Babes With A Beatitude Bible Study to start up again in the fall. The ladies are going to love drinking their coffee without having to jerk the cup up off the table in between sips.
And that, my friends is my craft journey with chalk paint. Thanks for letting me share it with you this week. If you have any questions or items I didn't cover, please leave a comment below and I will be happy to answer to the best of my knowledge.

Kitchen Table Makeover
Turn Shabby into Chic